

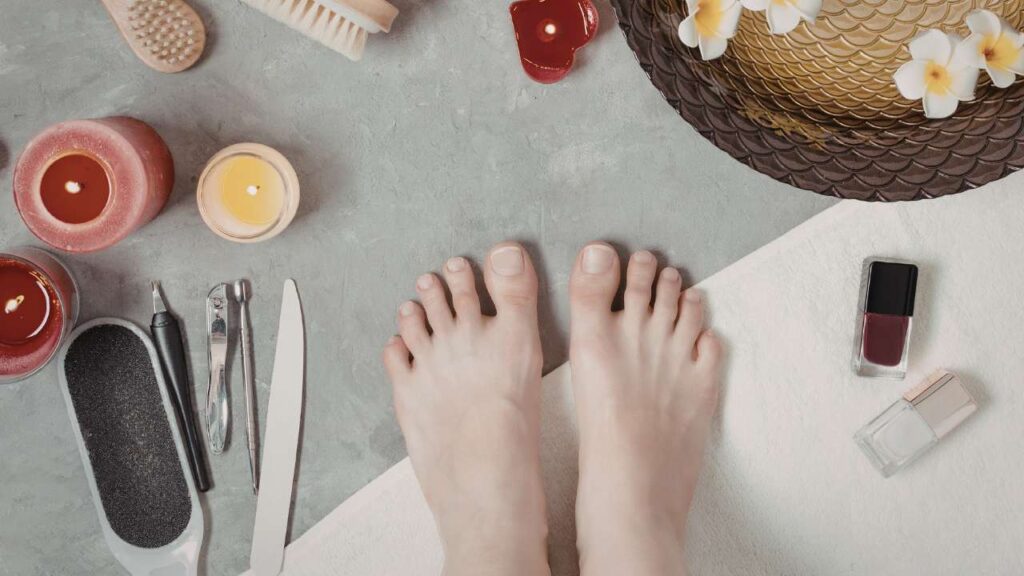
Picture a pedicure so precise that your polish looks freshly applied even three weeks later. That’s the promise of the Russian pedicure, a waterless, e-file-based technique that’s taken the beauty world by storm. But here’s the truth: while you can attempt this advanced method at home, it’s not as simple as watching a quick tutorial and picking up a nail drill.
The Russian pedicure uses specialized electric file bits to remove dead cuticle tissue on completely dry feet. Unlike traditional pedicures that soften skin with water (making precise work nearly impossible), this dry method allows for surgical accuracy. The result? Polish applied so close to the cuticle that regrowth stays hidden for weeks.
However, this technique requires professional-grade tools, extensive practice, and carries real injury risks if performed incorrectly. The same e-file that creates flawless results in trained hands can damage your nail plate or living tissue when misused. This article provides realistic DIY Russian pedicure steps for committed learners while emphasizing critical safety protocols. You’ll discover exactly what tools you need, how to perform each step safely, and most importantly, when professional service is the wiser choice. Whether you’re considering the DIY route or seeking expert care, understanding this technique helps you make the best decision for your nail health.
What makes Russian pedicure different from regular pedicure?
The fundamental difference lies in the approach: Russian pedicures work on completely dry feet using electric files, while traditional pedicures rely on water soaking and manual tools. This distinction affects everything from technique to results.
| Aspect | Russian Pedicure | Traditional Pedicure |
|---|---|---|
| Method | Dry technique (no water) | Water soaking to soften skin |
| Primary Tool | Professional e-file with diamond bits | Manual nippers, scrapers, pumice stones |
| Cuticle Work | Gentle buffing of dead tissue only | Cutting living skin with nippers |
| Duration | 3-5 weeks without chipping | 7-10 days before visible wear |
| Hygiene | No shared water baths | Potential bacteria in footbaths |
| Skill Required | Advanced (requires training) | Beginner-friendly |
| Risk Level | High if untrained | Lower risk with basic tools |
The dry pedicure technique prevents nail plate expansion that occurs when nails absorb water. When nails expand during soaking and then contract after drying, polish adhesion weakens, leading to premature chipping. The Russian method maintains nail stability throughout the process.
This technique distinguishes between pterygium (dead tissue attached to the nail that should be removed) and eponychium (the living protective seal that must be preserved). Traditional methods often cut both indiscriminately. The e-file allows technicians to see exact boundaries on dry skin and remove only what’s necessary.
The “under-cuticle” polish application, getting color extremely close to the skin, creates that seamless, professional look that hides regrowth for weeks. This is what makes the Russian pedicure vs regular pedicure comparison so striking. You’re not just getting a cosmetic treatment; you’re receiving precision work that respects your nail’s natural anatomy.
Tools you need for safe at-home Russian pedicure
Attempting this technique with inadequate equipment is dangerous and ineffective. Here’s what you actually need for safe Russian pedicure at home execution.
Professional E-file (Nail Drill): Battery-operated hobby drills lack the power for this work. You need a corded machine with these specifications:
Adjustable speed (5,000-30,000 RPM)
High torque that won’t stall when touching skin
Stable handpiece with minimal vibration
Forward and reverse functions
Expect to invest $80-150 for quality equipment. This isn’t optional, inferior tools cause injuries.
Specialized Drill Bit Set (Most Critical Component):
Flame bit: Lifts cuticle and cleans lateral sinuses (nail sides)
Diamond ball bit: Removes lifted dead cuticle tissue with gentle buffing
Cone or needle bit: Detailed work in tight corners
Carbide/ceramic bits: Gel polish removal and nail shaping
Silicone polishing bits: Smooths skin after exfoliation
A complete bit set costs $40-80. Never use bits interchangeably between manicures and pedicures due to hygiene concerns. Each bit serves a specific purpose, and using the wrong one can cause damage.
Manual and Safety Tools:
Professional-grade metal cuticle pusher or disposable orange wood sticks for initial lifting
Dust collector or N95 mask (non-negotiable, inhaling fine skin particles poses health risks)
Soft brush for debris removal
Magnifying lamp for better visibility during detailed work
Additional Supplies:
Fine-grit files (180/240 grit) for shaping toenails
Antiseptic spray
Disinfectant solution for bit sterilization between uses
Gel base coat, color, top coat
LED/UV lamp for curing
Cuticle oil and foot cream for post-treatment hydration
Total investment for quality Russian pedicure tools ranges from $150-300. Cheap alternatives increase injury risk exponentially. The nail drill for pedicure work must have medical-grade quality, not craft-store quality. This is where many DIY attempts fail before they begin.
Consider this: professional technicians invest thousands in their education and equipment. If you’re not prepared to invest properly in tools and training, professional service becomes the more economical and safer option.
Step-by-step guide to performing Russian pedicure at home
This is the most technical phase requiring patience and precision. Follow these DIY Russian pedicure steps exactly as written. Rushing through any stage compromises both safety and results.
Preparation and sanitation
Spray feet thoroughly with antiseptic to eliminate surface bacteria. Allow it to air dry completely, working on damp skin defeats the purpose of the dry method.
If removing existing gel polish, use a medium-grit carbide bit set to low speed. Move the bit opposite to its rotation direction to maintain control. Remove color layer by layer, never try to debulk everything at once. This prevents heat buildup and nail plate damage.
Clean all bits with disinfectant before starting fresh work. Set up your dust collector or put on your mask now, not halfway through the process. Position yourself comfortably with good lighting. Poor ergonomics lead to shaky hands and mistakes.
Nail shaping and surface prep
Trim toenails to your desired length using clippers or the e-file on low speed. Shape using a manual file, square or squoval edges work best for toes because they prevent ingrown nails. Round shapes on toenails often lead to painful ingrowth.
File in one direction rather than sawing back and forth. This prevents splitting and creates smoother edges. Check that all edges are smooth and symmetrical by running your finger along them. Any sharp spots will catch on socks and cause breakage.
Brush away every dust particle before moving to cuticle work. Any debris left will interfere with the next steps and can get trapped under lifted cuticle tissue.
Dry cuticle removal technique (the critical step)
This stage separates successful results from damaged nails. Take your time here, this is where most injuries occur when people rush.
Use your pusher to manually lift the cuticle from the nail plate, creating a visible pocket. Work gently in small sections. Don’t skip this manual step, going straight to the e-file causes trauma. You should see a clear line where dead tissue separates from the nail.
Flame Bit Application:
Set your e-file to low speed (5,000-10,000 RPM for beginners). Hold the bit parallel to the nail surface, never angled downward. Work the left side of each nail in forward direction, then switch to reverse for the right side.
This lifts pterygium (dead tissue stuck to the nail) and cleans the lateral sinuses. Keep the bit moving constantly in smooth strokes. Think of it like painting, long, even movements rather than jabbing motions.
If you feel heat, you’re staying in one spot too long or applying pressure. The bit’s grit should do the work, not your hand pressure. Heat means friction, and friction means damage.
Ball Bit Refinement:
Once dead skin is visibly lifted and standing away from the nail, switch to your diamond ball bit. Hold it perpendicular to the lifted cuticle edge. Use light, feathering strokes to buff away the dead tissue. It should come off as fine white powder.
If you see chunks or feel pulling, you’re working too aggressively. Never let this bit touch the nail plate itself, it’s designed only for skin. This is the most common mistake in cuticle removal pedicure work.
Work systematically around each nail. Don’t jump randomly between toes. Complete one nail fully before moving to the next. This prevents confusion about which areas you’ve already addressed.
Golden Rule: Pain means stop. A properly executed Russian pedicure feels like gentle vibration, nothing more. Discomfort indicates you’re damaging living tissue or the nail plate. There’s no such thing as “good pain” in this technique.
Polish application and finishing
Clear all dust with your soft brush, be thorough. Even tiny particles will create bumps under your polish. Wipe each nail with cleanser to remove natural oils that prevent adhesion.
Apply a thin layer of gel base coat, working it close to the cuticle pocket you’ve created. Don’t flood the cuticles, precision matters here. Cure under your LED lamp per product instructions.
Apply color in two thin coats rather than one thick coat, thin layers cure more completely and last longer. Cap the free edge (run the brush along the tip) to seal and prevent chipping. Cure each layer fully.
Seal with top coat, again capping the free edge. The electric file pedicure preparation allows polish to sit flush against the skin, which is why these results last so long.
Finish by massaging cuticle oil into the nail perimeters and rich cream into your heels. This rehydrates skin that may feel dry after the e-file work. Don’t skip this step, hydration prevents the skin from overproducing cells to compensate for dryness.
Callus management (optional)
If addressing heel calluses, use a PODO disc or large silicon bit. Work in circular motions with light pressure on the hardened areas. The dry skin shows you exactly where dead tissue ends and healthy skin begins, a major advantage of the dry method pedicure.
Stop when the surface feels smooth to touch, not when skin appears pink. Over-processing causes the body to produce thicker skin as protection. You want to remove calluses gradually over several sessions rather than aggressively in one sitting.
Pay attention to how your skin responds. If heels become tender or red, you’ve gone too far. The goal is smooth, comfortable feet, not raw skin.
Critical safety rules and when to see a professional
The risks of improper technique are serious and permanent. These safety protocols are non-negotiable for safe pedicure at home execution.
Absolute contraindications (Never attempt if you have):
Fungal nail infections, the e-file aerosolizes spores throughout your space
Open cuts, sores, or severe inflammation on feet
Paper-thin nails from previous damage or improper gel removal
Diabetes or circulatory issues, reduced sensation means you won’t feel injury until it’s severe
Blood thinning medications that increase bleeding risk
Immune system disorders that slow healing
Non-negotiable safety protocols:
Start at the lowest speed setting and increase only after gaining confidence through practice. Never hold the bit stationary on one spot, this causes friction burns. Apply zero pressure; let the bit’s abrasive surface do the work.
Keep the bit parallel to the nail plate at all times. Angling creates gouges and damage. Stop immediately if you feel heat, pain, or see any bleeding. Clean and disinfect any injury, then seek medical attention if bleeding doesn’t stop quickly.
Practice on fake nail tips extensively before working on yourself. You need muscle memory for proper bit handling. Most professionals practice for months before working on clients.
Work in good lighting. Shadows hide details that matter. Consider investing in a magnifying lamp designed for nail work.
Signs you need professional help:
Uncertainty about tool handling or which bit to use for each step indicates you’re not ready. Previous injury from DIY attempts means your technique needs correction before trying again. If you simply want the safest, most precise results without risk, professional service is the answer.
Persistent nail problems like lifting, peeling, or discoloration suggest underlying issues that need expert diagnosis. Don’t attempt to fix damaged nails yourself, you may make the problem worse.
The professional advantage:
At Xpert Russian Manicure Salon, certified technicians undergo advanced specialized training to master e-file control. The procedure remains safe, gentle, and completely pain-free in their hands. The salon uses medical-grade autoclave sterilization for all metal tools, a level of hygiene impossible to replicate at home.
Their expertise means you get flawless results lasting 3-5 weeks without any risk of injury. A quality Russian pedicure should feel comfortable from start to finish. If it hurts, something is wrong.
Professional technicians can also assess your nail health and recommend appropriate treatments. They spot potential problems before they become serious. This preventive care often saves money and discomfort in the long run.
Final thoughts
The DIY Russian pedicure is technically possible but demands significant investment in professional-grade tools, dedicated time for skill development, and acceptance of real injury risks. The technique’s precision and safety are genuinely best achieved by trained professionals who’ve mastered e-file control through extensive education and practice.
At Xpert Russian Manicure Salon, certified technicians deliver the refined results this technique promises, medical-grade sterilization, pain-free experience, and guaranteed longevity of 3-5 weeks, without any risk to your nail health. For those committed to the DIY path, practice extensively on fake nail tips before touching your own feet, start at the lowest speeds, and prioritize safety over speed at every step.
For those seeking the safest, most refined results, professional service eliminates risks while delivering superior aesthetic outcomes that truly last. Whether you choose to learn this advanced technique at home or trust the experts at Xpert Russian Manicure Salon, prioritize the health of your nails above all else. Your feet deserve care that’s both beautiful and safe.
Remember: there’s no shame in choosing professional service. The money you spend on quality treatment often costs less than replacing damaged tools, treating injuries, or correcting mistakes. Make the choice that serves your needs, your budget, and most importantly, your health.
FAQs about DIY Russian pedicure technique
How long does a DIY Russian pedicure last?
When performed correctly with proper nail preparation and quality gel polish, a Russian pedicure lasts 3-4 weeks without chipping or lifting. Longevity depends entirely on technique precision, especially how close you apply polish to the cuticle.
Professional results from trained technicians at salons like Xpert Russian Manicure Salon can last up to 5 weeks because their expertise means perfect preparation and application every time. They’ve mastered the subtle details that extend wear time.
Your lifestyle also affects longevity. Frequent swimming, hot yoga, or wearing tight shoes can shorten polish life regardless of application quality.
Can I use a regular nail drill for Russian pedicure?
No. Battery-operated hobby drills sold for casual home use lack the torque and speed control needed for safe Russian pedicure nail drill work. You need a professional corded e-file with adjustable RPM (5,000-30,000), stable handpiece with minimal vibration, and forward/reverse function.
Using inadequate equipment significantly increases injury risk while producing poor results. The tool investment is substantial, but attempting this technique with wrong equipment is dangerous. Hobby drills stall when they meet resistance, causing the bit to grab and tear tissue.
Professional e-files maintain consistent speed under pressure, which is what makes them safe. This isn’t an area where you can cut corners.
How often should I do Russian pedicure at home?
Perform deep cuticle cleaning every 4 weeks maximum. More frequent processing causes your skin to thicken as a defense mechanism, creating the opposite of your desired result. Between sessions, maintain results with daily cuticle oil application.
If your nails grow slowly, you can extend to 5-6 weeks between treatments. The Russian pedicure tutorial approach focuses on quality over frequency, overprocessing damages rather than improves nail health.
Listen to your body. If cuticles aren’t growing back yet, there’s no reason to repeat the process. You’re maintaining, not constantly removing.
Is Russian pedicure safe for everyone?
No. People with diabetes, poor circulation, immune disorders, or those taking blood thinners should only receive this treatment from licensed professionals who understand medical contraindications. The reduced sensation common in these conditions means you might not feel injury occurring.
Pregnant women should consult their healthcare provider before attempting this technique, particularly regarding inhaling nail dust particles. While the procedure itself isn’t inherently dangerous during pregnancy, the dust exposure requires consideration.
Anyone with a history of keloid scarring should avoid aggressive cuticle work, as it can trigger excessive scar tissue formation.
What’s the biggest mistake beginners make?
Applying too much pressure with the e-file. The bit’s abrasive surface does the work, your job is simply to guide it. Pressing harder doesn’t speed up the process; it causes heat, friction burns, and damage to healthy tissue.
The second most common mistake is working too quickly. This technique requires patience. Rushing leads to uneven results and injuries. Set aside at least 90 minutes for your first attempt, possibly longer.
Third is using dull or damaged bits. Worn bits require more pressure to work, which defeats the safety principle. Replace bits regularly based on usage frequency.