

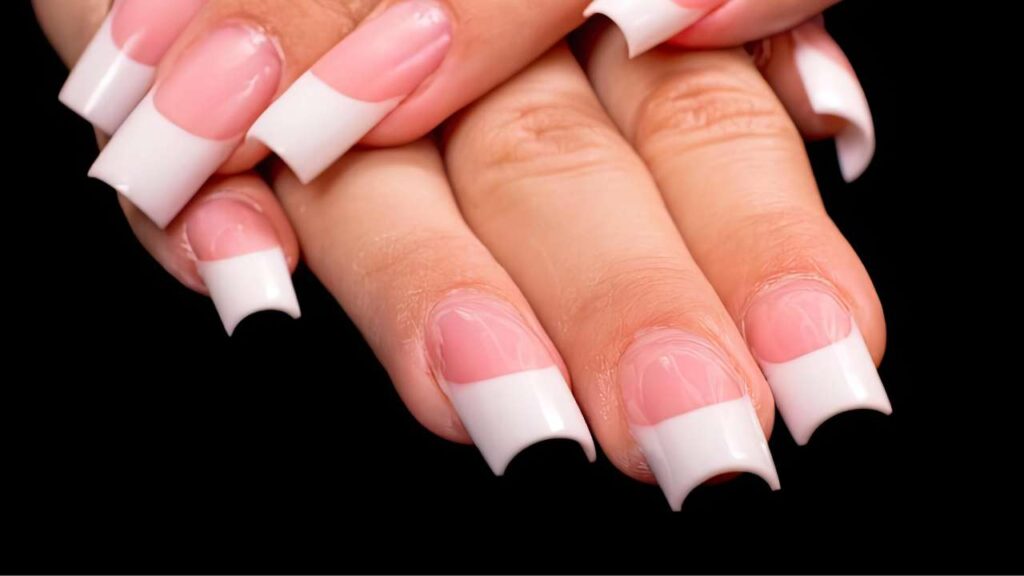
Maintaining the beautiful appearance of your acrylic nails for a long time often brings the issue of dirt gathering underneath. To clean under acrylic nails safely without damage, use a soft-bristled nail brush with warm antibacterial soapy water and gentle sweeping motions, avoiding sharp tools or harsh scrubbing. This proactive approach prevents concerns about cleanliness and potential harm, addressing the common misconception that deep cleaning requires harsh methods. This guide shares effective ways to clean under your nails, helping your manicure stay attractive and sound.
Keeping acrylic nails daily clean underneath
To keep acrylic nails clean underneath, daily hygiene is essential for a durable manicure. This practice actively prevents the accumulation of dirt and bacteria that can cause discoloration or infections, starting with mindful handwashing and selecting the right tools for gentle cleaning.
Frequent handwashing with antibacterial soap and warm water is necessary, especially after cooking or handling dirty items. However, the step that follows is equally important. You must dry your hands and nails thoroughly with a clean towel. Trapped moisture is a main reason for acrylic lifting, forming a space where bacteria can grow. This damp environment lessens the adhesion, inviting issues like discoloration or infections. Studies show that up to 70% of bacterial infections under artificial nails are linked to trapped moisture and inadequate drying. Always pat your hands completely dry after washing.
For removing physical debris, a soft-bristled nail brush or a clean, soft toothbrush works most suitably. Keep a separate brush specifically for your nails. Dip the brush in warm, soapy water and use gentle, sweeping motions to clean under the nail tip. Avoid aggressive scrubbing, as too much pressure can lessen the adhesion between the acrylic and your natural nail, a bond that relies on a chemical reaction between the monomer liquid and polymer powder during application, often enhanced by a specialized nail primer. If you encounter more stubborn dirt, a sterilized cuticle pusher can be used to carefully scrape it out. Be sure not to insert the tool too deeply to avoid injuring the sensitive skin beneath the nail.
Advanced cleaning and preventing common issues with acrylic nails
Advanced cleaning methods and proactive prevention are key to achieving a deeper, professional-quality clean for acrylic nails and keeping them healthy between salon visits. Understanding these techniques prepares you to notice and address problems early on.
Professional nail technicians often use an electric file (e-file) with specific bits, like cone-shaped bits, and varying grit levels (e.g., fine 240-grit for finishing, medium 180-grit for reduction) for a precise clean. This method, when done by a skilled professional at a salon like Xpert Russian Manicure Salon, efficiently clears away debris and smooths the cuticle area without using water. The e-file must be operated at a low RPM (Revolutions Per Minute) to prevent friction burns and guard the sensitive skin of the hyponychium, which is the protective barrier beneath the free edge of the nail that helps seal the nail plate to the nail bed. While effective, e-files require skill and training. It’s estimated that less than 10% of at-home nail enthusiasts possess the training to safely operate one without causing damage to the natural nail plate or hyponychium. Attempting to use one at home without proper instruction can cause serious harm to your natural nails and surrounding skin, leading to thinning, burns, or infection.
Noticing discoloration early is important for addressing it promptly. Not all stains are simple dirt; some can show bacterial or fungal issues. Being able to distinguish between them helps you choose the right initial action.
| Discoloration Type | Common Cause | Initial Action |
|---|---|---|
| Greenish-black spot | Pseudomonas aeruginosa (bacteria) | This often means moisture is trapped. Seek professional help for safe acrylic removal, then apply a topical antibiotic as advised by a doctor. |
| Yellow, brown streaks | Fungal infection (onychomycosis) | Requires professional diagnosis. The acrylic will need removal, followed by an antifungal treatment prescribed by a medical professional. |
| Dull yellowing | Staining from polish, environment | Usually cosmetic. Try gentle whitening treatments or use a preventative base coat. Consider professional cleaning if stubborn. |
Healthy nails over time rely on some preventative habits. Wearing latex or rubber gloves during household chores protects your nails from moisture and dirt. Regular salon visits for fills every two to three weeks are important to seal any lifting and keep the nail’s structure sound. It is also advised to have a complete removal and reapplication after three months of constant wear to give your natural nails a rest.
Restoring brightness and knowing when to seek professional care
Over time, acrylic nails can become faded or marked from makeup, food, or environmental factors. Research suggests that over 60% of acrylic nail wearers experience some form of discoloration or staining within a month of application, often due to everyday activities like cooking or makeup use. Luckily, many home methods can make them bright again without harm. It is also important to recognize when an issue needs a professional nail technician or a doctor.
You can use several common household items to whiten your nails safely. These gentle treatments can remove marks and improve the look of your acrylics.
Whitening Toothpaste: Apply whitening toothpaste over and under your nails. Use a soft brush to scrub the surfaces, let it sit for 5 to 10 minutes, and then rinse with warm water. This works by gently abrading surface stains.
Baking Soda Paste: Mix baking soda with a small amount of lemon juice to form a paste. Scrub this onto the nails, but avoid this method if you have any cuts or hangnails because of the acid in the lemon. A simple paste of baking soda and water is a gentler alternative, effective for mild discoloration.
Hydrogen Peroxide Soak: Create a solution of one part hydrogen peroxide and three parts water. Soak your unpolished nails in this mixture for 10 to 15 minutes to help lessen yellowing. Hydrogen peroxide has mild bleaching properties.
White Vinegar Soak: A mixture of one tablespoon of white vinegar in a small cup of water acts as a gentle clarifying soak. Rest your fingertips in the solution for about five minutes. Vinegar helps to break down film and residues.
Denture Tablets: Dissolving antibacterial denture tablets in a bowl of water forms a good soak. Soaking your nails for five minutes can remove marks and eliminate surface bacteria. Follow package directions for best results.
A good base coat applied before colored polish is the best method to stop staining from happening in the first place. If you suspect a bacterial or fungal infection, professional removal is needed. An expert technician will employ safe practices, like e-file reduction and controlled acetone soaks, without forcing or pulling the acrylic off. It’s crucial for professional removal to use 100% pure acetone, as products with lower concentrations or added ingredients can prolong soaking times and unnecessarily dry out the surrounding skin and cuticles. If signs such as redness, swelling, discomfort, or broken skin show up, you should consult a doctor right away, as these could signal a more serious infection requiring medical treatment.
Xpert Russian Manicure Salon: Your partner for pristine nail health
Xpert Russian Manicure Salon is your ideal partner for pristine acrylic nail health, offering precise services that meet the highest standards in hygiene and lasting quality. Our expert Russian manicure techniques, medical-grade sanitation, and dry care methods ensure your acrylics remain clean, securely attached, and free from harm, contributing to overall nail health and a flawless appearance.
Maintaining immaculate acrylic nails for lasting beauty
Consistent daily hygiene is the key factor for sound, attractive acrylic nails. Focus on gentle cleaning methods and professional maintenance to avoid harm. Being active in finding and dealing with issues helps the lasting quality and look of your manicure.
FAQ’s about acrylic nails cleanness
How often should you clean under acrylic nails?
Cleaning under acrylic nails should be a daily routine, particularly after handwashing, cooking, or any activity where dirt might accumulate.
Can you use rubbing alcohol to clean under acrylic nails?
Rubbing alcohol can be used occasionally as a disinfectant, but daily use may dehydrate the nail and cuticles, potentially lessening the acrylic adhesion.
What is the best way to remove dirt from under long acrylic nails?
A soft-bristled nail brush with antibacterial soap is most suitable. For stubborn dirt, a cuticle pusher can be applied with great care to avoid injury.
Does putting clear polish under acrylic nails help keep them clean?
No, applying clear polish under acrylics is not advised. It can hold moisture or disrupt the acrylic’s adhesion, possibly leading to lifting.
What does “greenie” on an acrylic nail mean?
A “greenie” is a green spot showing a bacterial infection, typically Pseudomonas aeruginosa, growing well in trapped moisture between the nails.