
The moment acrylics start growing out, catching on hair and sweater threads, that urge to just peel them off kicks in. Acrylic nail removal can feel tempting to rush, especially after a long day. A quick pull seems faster than setting up tools and soaking in acetone.
Acrylics are not just “thick polish.” They are a mix of liquid monomer and powder polymer that hardens into a strong layer over the natural nail. That strength is great for wear, but it is also why ripping them off can strip your own keratin. Nails can end up paper-thin, sore, and rough for weeks.
The good news is that safe acrylic nail removal at home is possible. With the right products, enough time, and a gentle approach, you can take them off without wrecking your natural nails. In this guide you will see:
What to use to remove acrylic nails at home
How to use pure acetone step by step
The aftercare that helps nails bounce back
When it is smarter to let a professional, like the team at Xpert Russian Manicure Salon, handle the process for you
What you need before starting acrylic nail removal
The smoothest acrylic nails removal starts before any soaking. Rushing around mid-process to find cotton or a file is how people skip steps, pull at product, and hurt their nails. Setting everything up at once helps you stay calm, careful, and focused on each hand.
For a home setup that feels close to a salon, you only need a small group of tools and products. Most are simple and easy to find, but each one plays a clear role. Here is a practical way to organize what you need:
Use 100% pure acetone instead of regular nail polish remover. Pure acetone breaks down the acrylic structure; weaker removers only soften the surface and force extra scraping. Look for cosmetic-grade acetone so you know it is meant for skin contact.
Keep nail clippers, a coarse nail file, and a fine buffer together as your shaping tools. Clippers shorten the acrylic so less product has to dissolve. The coarse file roughens the topcoat so acetone can sink in, while the buffer smooths the natural nail later.
Prepare cotton balls or pads along with small pieces of aluminum foil. Cotton soaked in acetone sits on each nail and does the real dissolving work. Foil holds the cotton in place and keeps warmth in, which speeds up acrylic nail removal.
Have a cuticle pusher plus skin protectors ready. A wooden or metal pusher helps glide softened acrylic off the nail plate without forcing it. Petroleum jelly or thick cream around the nails protects skin from the drying effect of acetone.
Finish your kit with cuticle oil, a rich hand cream, and an old towel. The towel shields your table from spills, while oil and cream bring moisture back after everything is off. This simple trio makes a big difference in how your hands feel afterward.
To set up your workspace:
Choose a room with moving air and open a window if you can.
Lay down the towel or paper towels so any drips do not ruin furniture.
Keep acetone away from candles, heaters, or smoking areas, since the liquid and fumes are very flammable.
Plan for at least 45 to 60 minutes with no rush so you can move slowly and protect your natural nails.
These are many of the same basics nail techs at Xpert Russian Manicure Salon rely on in the salon, just scaled for home use.
How to use acetone to remove acrylic nails at home
Pure acetone is what most professionals use for acrylic nail removal, and the same idea works at home. The key is to trim, file, protect your skin, and let the acetone do the work. Here is how to use acetone to remove acrylic nails safely and with as little damage as possible.
Step 1 — trim and file the acrylics
Start by cutting the acrylics down so there is less bulk for the acetone to dissolve. Use sharp nail clippers and cut small sections from each side toward the center instead of snapping the full tip in one go. This keeps pressure off the natural nail and helps prevent painful cracks or splits.
Next, take a coarse nail file and go over the whole surface of each acrylic:
File off the shiny topcoat, gel color, and any glitter or nail art.
Aim to remove the smooth seal so acetone can soak into the product instead of sitting on top.
Use light but steady pressure and stop as soon as you see the acrylic turning thinner and more matte.
Do not dig into your natural nail. If you start to see your nail plate or feel heat from friction, pause and move to another finger for a moment.
Step 2 — protect skin, then soak
Before any soaking, protect the surrounding skin, because acetone dries it very quickly. Apply a generous layer of petroleum jelly or a thick cream:
Around each nail
Along the side walls
Over the fingertips
Keep the product off the acrylic itself so it does not block the acetone.
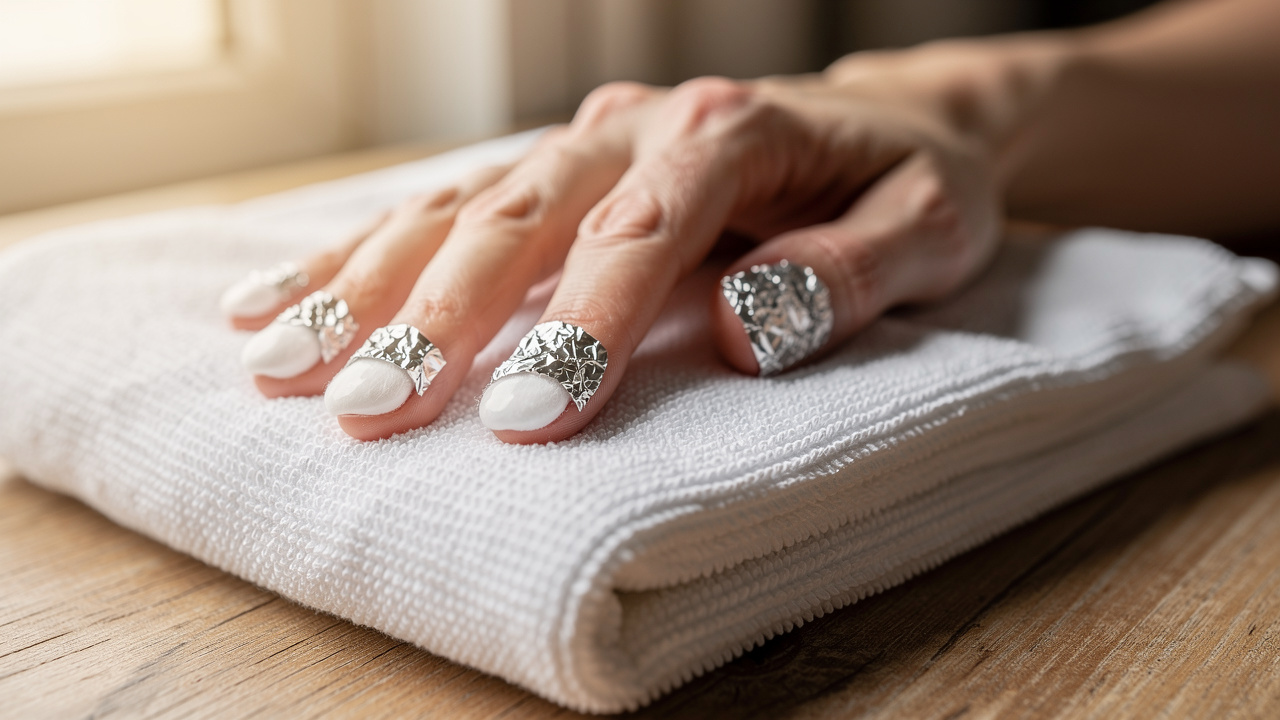
For the foil method:
Soak a cotton ball or pad in 100% pure acetone until it is saturated but not dripping.
Press it firmly over one nail so the whole acrylic surface is covered.
Wrap that fingertip tightly with a small square of foil.
Repeat on every finger, making sure the cotton stays in full contact with the acrylic.
Leave the wraps on for about 20–30 minutes; the foil helps trap warmth, which speeds up the breakdown.
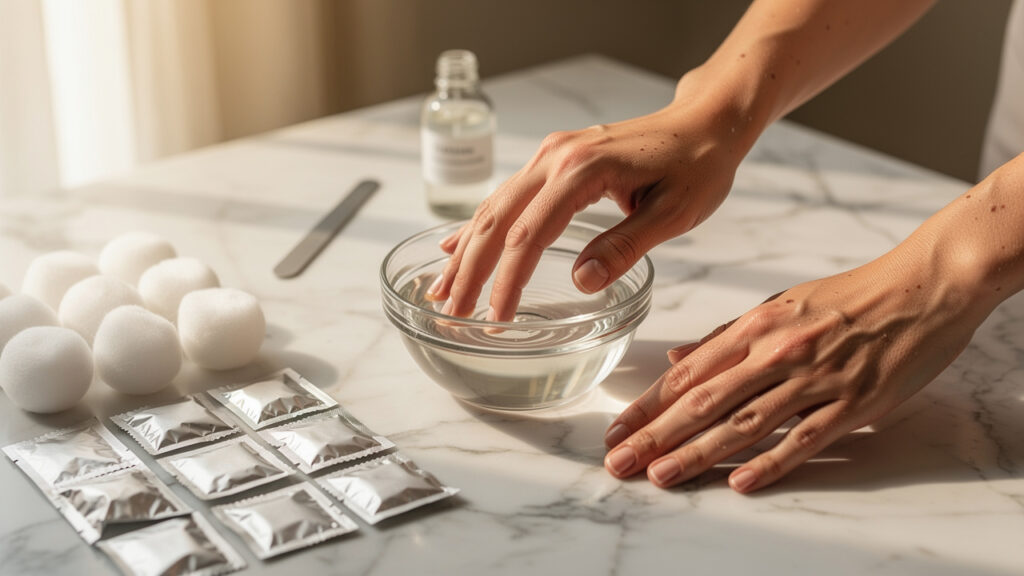
As an alternative, you can try the bowl method:
Pour pure acetone into a small glass bowl so it is deep enough to cover your fingertips.
Place only the tips of your fingers into the bowl and soak for 15–20 minutes.
This method works, but more skin touches the acetone, which can leave hands feeling much drier. If you choose it, apply extra cream afterward and avoid soaking longer than needed.
Nail pros often repeat the same rule: “Soak longer, scrape less.” The more time acetone has to work, the less you need to push.
Step 3 — remove, buff, and shape
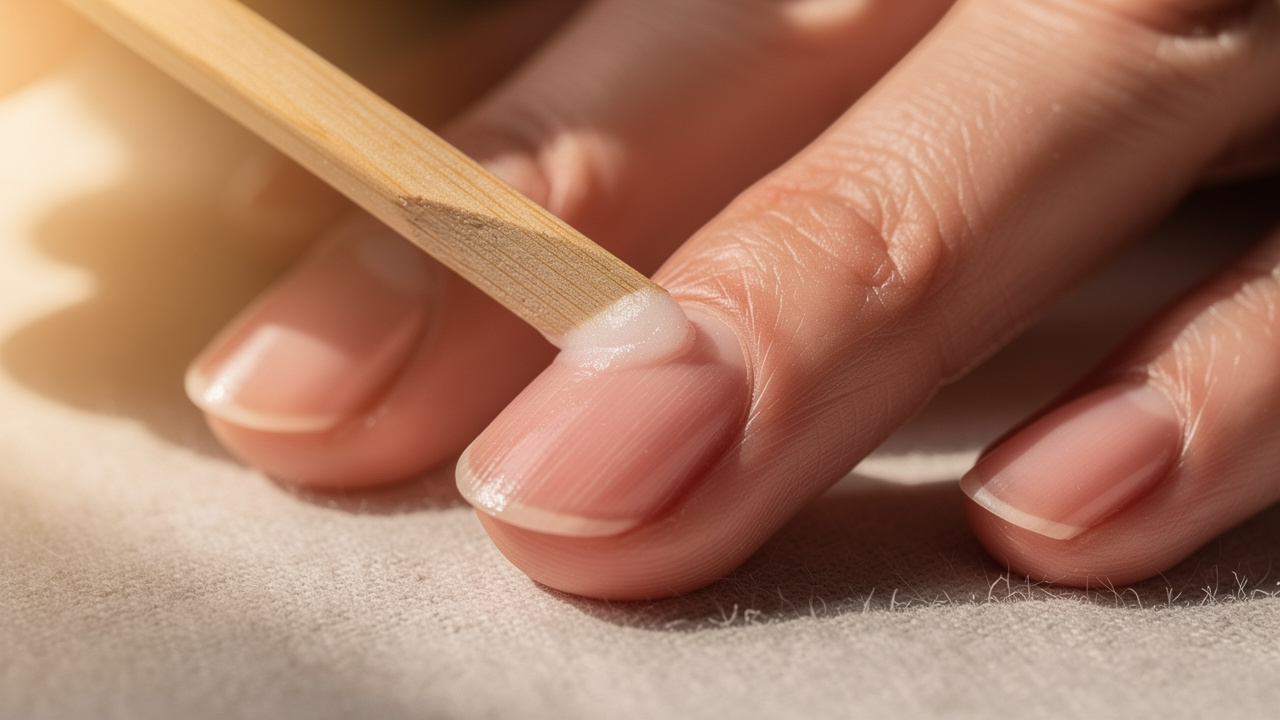
After soaking, unwrap just one nail to check progress. The acrylic should look swollen and feel soft or jelly-like when you press it lightly. Take a cuticle pusher and gently glide the softened acrylic off from the cuticle area toward the free edge.
If a section will not move easily:
Stop pushing instead of prying or picking.
Rewrap that nail with fresh acetone-soaked cotton and foil.
Give it another 5–10 minutes before checking again.
Once all acrylic is gone:
Use a fine buffer to lightly smooth the nail surface, focusing only on rough patches.
Shape your natural nails with a gentle file, moving in one direction so the edges stay smooth instead of splitting.
Wash your hands with mild soap and lukewarm water to remove any residue.
Moving slowly through this stage protects the thin natural plate that sat under all that product. If anything feels painful, stop and give that nail more soaking time instead of forcing it.
How to remove acrylic nails without acetone
Some people cannot tolerate acetone on their skin, or they simply do not have it at home. In that case, it is natural to ask what can I use to remove acrylic nails without acetone. The only real at-home option is a long soak in warm, soapy water, and even that has limits.
This method aims to soften the acrylic and loosen the bond at the edges. It works best on:
Older sets that already have lifting
Thinner product
Shorter acrylics with less surface area
Thick, fresh salon work usually holds on very firmly, so expectations need to stay realistic.
Here is how to try it:
Fill a bowl with comfortably warm water and add a mild soap, such as hand soap or gentle dish soap. Stir it so the soap is mixed in and small bubbles form. The water should feel like a warm bath, not hot enough to sting your skin.
Submerge your fingertips and keep them in the water for at least forty minutes. You may need to add more warm water during this time so the temperature stays steady. Use this time to relax, but keep your hands under the surface so the acrylic has the best chance to soften.
After soaking, check the side edges of each nail with a cuticle stick. If the edges have lifted, ease the acrylic up in tiny movements instead of pulling hard. If you feel resistance or any pain, place your hand back in the bowl and soak longer rather than forcing anything.
Avoid tricks you may see online like slipping floss under the acrylic or “popping” the product off with a card. Those methods can tear the natural nail and cause bleeding or long-lasting ridges.
This acetone-free approach is slower and not guaranteed, especially for thick, well-done sets. For true acetone allergies or very sensitive skin, the safest answer to what can I use to remove acrylic nails without acetone is usually a trained nail technician who has access to alternative methods and tools.
Post-removal aftercare for healthy natural nails
Right after acrylic nails removal, the natural nails often feel dry, thin, and fragile. Acetone pulls natural oils from both skin and nails, and the plate has been covered by product for weeks. This is the moment when gentle aftercare makes the most difference.
Start with cuticle oil as soon as your hands are dry. Massage it into the nail plate, the cuticle line, and the surrounding skin. This touch helps bring blood flow back to the area and supports new, stronger growth.
Jojoba oil is a favorite recommendation at Xpert Russian Manicure Salon for this step. It behaves very similar to the skin’s own oils, so it sinks deeply into the keratin structure instead of just sitting on top. That deep moisture keeps the nail flexible and less likely to crack or peel over the next days.
Follow oil with a rich hand cream and, if needed, a nail strengthener. Pick a cream that feels thick and comforting, then apply it several times a day, especially after washing hands. A clear strengthener with keratin can give the plate light support, and some people like to add a daily biotin supplement to support nail and hair growth.
Give your nails a short break from acrylics or gels. One to two weeks without enhancements helps the plate rest and rebuild. Keep nails trimmed short, keep edges smooth, and stick to clear strengthening polish during this reset period.
You can also protect freshly bare nails by:
Wearing gloves for housework and dishwashing
Avoiding very hot water on your hands
Skipping harsh cleaning products without protection
At Xpert Russian Manicure Salon, professional removal often includes reducing most of the acrylic with a precise e-file before any soak. Only a paper-thin layer remains over the natural nail before acetone touches it, which means less exposure for the plate and faster recovery. That same mindset carries into their post-care advice, which centers on hydration, gentle handling, and regular oil use.
When at-home removal is not the right call
Even with a solid plan, home acrylic nail removal does not suit every situation. Sometimes the product is too thick, the nails feel sore, or the skin reacts to acetone. Knowing when to stop and seek help protects both nail health and comfort.
Acrylics not softening can point to very thick product or a topcoat that was not filed enough. In that case, stop scraping and go back to gentle filing on the surface. Then repeat the soak in short rounds instead of digging at the remaining acrylic.
Natural nails looking damaged with white spots, peeling layers, or deep ridges means the plate has already been stressed. Pause all filing and scraping and move to oils, strengtheners, and short lengths. If the damage looks severe, a professional can assess the situation and suggest a safe plan.
Skin irritation or redness during soaking signals sensitivity to acetone or to pressure from tools. Make sure the petroleum jelly barrier is generous, and rinse hands right away if burning appears. Ongoing redness is a sign to stop home removal and call a salon.
Other situations where a salon visit is the better choice:
A known acetone allergy or very reactive skin
Any pain during the process
Very thick, long, or art-heavy acrylic sets
Signs of infection, such as swelling, heat, or pus around the nail
People who are low on time or patience also do better in a salon, where the process is faster and more controlled. Xpert Russian Manicure Salon uses high-grade acetone, precise e-file work, and careful technique to take off product while protecting the natural nail plate, which is hard to match in a home setup.
Key points and next steps
Safe acrylic nail removal at home is not about strength; it is about patience and a gentle method. Pure acetone, the foil method, and careful filing let the product soften so it can slide off instead of being ripped away. Skipping steps or rushing the soak is what leads to peeling layers of the natural nail.
The biggest mistake to avoid is forcing acrylic that has not fully dissolved. Any time you feel yourself tugging hard, it is time to rewrap that nail and soak longer. After everything is off, steady use of cuticle oil and a good hand cream every day often makes the difference between nails that bounce back and nails that stay weak.
For anyone who feels unsure about what to use to remove acrylic nails, has skin sensitivities, or simply wants the best outcome for their natural nails, professional care is a smart choice. Xpert Russian Manicure Salon focuses on careful removal, nail-friendly product choices, and thoughtful aftercare so clients leave with nails that look clean and feel comfortable, ready for the next style or a well-deserved break.
FAQs
Can I use acetone to remove acrylic nails safely at home?
Yes, you can use 100% pure cosmetic-grade acetone for acrylic nail removal at home. It is the same type of product used by professional salons, including Xpert Russian Manicure Salon. The key is to combine it with careful filing, the foil method, and plenty of time, instead of trying to scrape hard. Regular nail polish remover is weaker and often leads to extra rubbing and damage.
What can I use to remove acrylic nails without acetone?
The most common non-acetone method is a long soak in warm, soapy water. Hands sit in the bowl for at least forty minutes, and the edges are gently tested for lifting with a cuticle stick. This approach is much less reliable for salon-level acrylics and takes a lot of patience. For people with true acetone allergies, a professional who has other tools and techniques is usually the safest answer to what can I use to remove acrylic nails without acetone.
How long should I soak my nails in acetone to remove acrylics?
With the foil method, most sets need about 20–30 minutes of soaking to soften. The bowl method often works in 15–20 minutes but dries more of the skin on the fingers. Very thick or heavily built acrylics may need extra rounds of 5–10 minutes. Giving the acetone enough time to work is far better than trying to push or pull product off too soon.