
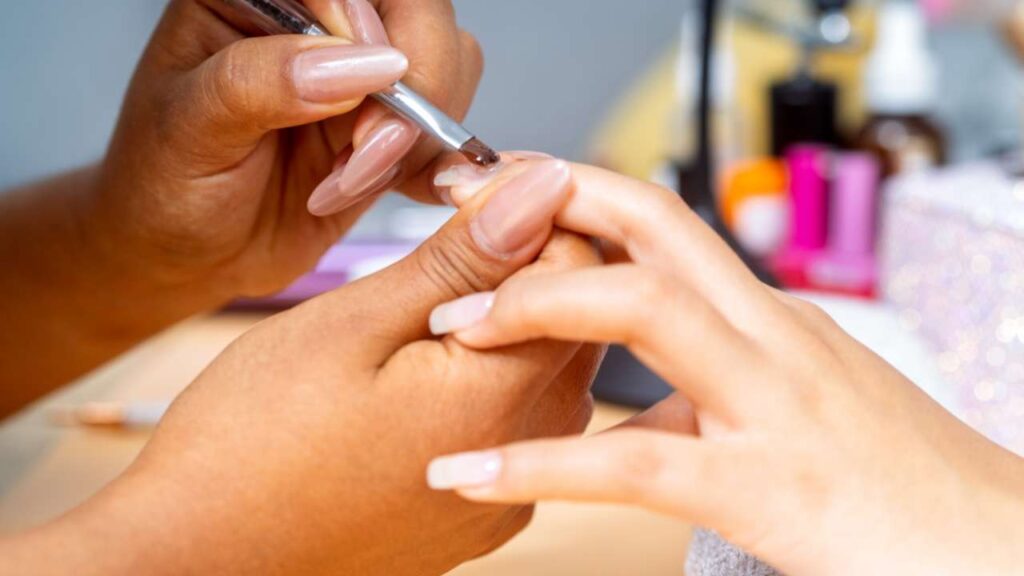
Have you ever stared at your builder gel nails after three weeks of wear and wondered why they refuse to budge after 20 minutes of soaking? Are you worried that removing your gel nails at home might leave your natural nails thin, brittle, and damaged? You’re not alone. Builder gel has become the go-to choice for anyone seeking long-lasting, salon-quality nails that can withstand daily wear. Its durability is precisely what makes it so popular, but that same strength can make removal feel like a frustrating puzzle.
Builder gel, also known as BIAB (Builder in a Bottle), sits between soft gel polish and hard gel in terms of strength and removal difficulty. Most builder gels are soak-off formulas, meaning they can be safely removed at home with acetone and patience. However, proper removal is essential for maintaining nail health. Aggressive peeling, prying, or scraping can strip away layers of your natural nail plate, leaving you with weak, sensitive nails that take months to recover.
This guide will walk you through the safe, step-by-step method for removing soak-off builder gel at home without damaging your natural nails. You’ll learn exactly which tools you need, how to break down the gel effectively, and when it’s time to seek professional help. We’ll also cover the critical difference between soak-off builder gel and hard gel (which requires professional e-file removal and is not covered in this DIY guide). By the end of this article, you’ll have the confidence to remove your builder gel safely, protect your nail health, and prepare your nails for their next beautiful manicure.
What you need for safe builder gel removal
Before you begin the removal process, gathering the right tools is essential for protecting your natural nails. Using improper materials or skipping key supplies can lead to damage that takes weeks to heal. Here’s everything you need for a safe, effective at-home removal:
Essential tools:
100-180 grit nail file: This coarse file breaks through the gel’s protective top coat, allowing acetone to penetrate the layers beneath
100% pure acetone: Regular nail polish remover contains water and conditioners that dilute its effectiveness. Only pure acetone can dissolve the cross-linked polymers in builder gel
Cotton pads or balls: These hold the acetone against your nails during the soaking process
Aluminum foil squares: Cut into 4×4 inch pieces to wrap each finger, trapping body heat that accelerates gel breakdown
Orangewood stick or plastic cuticle pusher: These gentle tools remove softened gel without scratching your natural nail plate
Protective items:
Cuticle oil (jojoba oil works beautifully): Protects the skin around your nails from acetone’s drying effects
Petroleum jelly or thick hand cream: Creates a moisture barrier on surrounding skin during the soaking process
Optional but helpful:
Silicone soaking caps: Reusable alternatives to foil wraps that are more comfortable and eco-friendly
Nail dust brush: Helps you monitor filing progress by clearing away debris
Rubbing alcohol: Cleanses nails after removal, preparing them for aftercare or new product application
Investing in quality tools makes the process safer, faster, and more comfortable. Never use metal tools like scrapers or pushers, as they can easily gouge softened softened natural nails. The few dollars spent on proper supplies will save you from potential nail damage that could cost much more to repair professionally.
Steps to remove builder gel at home
Removing builder gel safely requires patience and a methodical approach. Rushing any step is the primary cause of nail damage during at-home removal. Follow these steps carefully to protect your natural nail plate.
File the top layer
The first step is breaking through the gel’s protective seal. Builder gel has a non-porous top coat designed to resist liquids and wear. Using your 100-180 grit file, gently sand away this shiny surface layer. File in one direction rather than back-and-forth sawing motions, which can create heat and discomfort.
Remove approximately 30-50% of the gel’s bulk without reaching your natural nail. You’re creating a rough, matte surface that allows acetone to absorb into the deeper gel layers. Use your nail dust brush frequently to clear away debris and check your progress. Stop when the gel loses its glossy appearance and feels slightly textured. If you see a different color or texture that looks like your natural nail, stop filing immediately.
Protect your skin
Before applying acetone, create a protective barrier around your nails. Apply a generous amount of cuticle oil or petroleum jelly to the skin surrounding each nail and your fingertips. This prevents excessive dryness, peeling, and irritation from the acetone.
Keep the protective barrier off the filed gel surface itself, as oil can prevent acetone from penetrating effectively. This step is especially important for those with sensitive skin or anyone prone to cuticle dryness.
Soak with acetone
Now you’re ready for the soaking phase, which typically takes 15-20 minutes. You have two main methods to choose from:
Foil wrap method: Saturate a cotton pad with pure acetone and place it directly on your filed nail. Wrap your fingertip tightly with a square of aluminum foil, making sure there are no gaps where acetone vapors can escape. The foil traps your body heat, which accelerates the chemical breakdown of the gel. This method minimizes skin exposure and allows you to move around during the soaking time.
Bowl method: Pour pure acetone into a glass or ceramic bowl (never plastic, as acetone will melt it). Submerge your fingertips for 15-20 minutes. This method is faster for multiple nails but exposes more skin to the solvent, making pre-application of protective oil even more critical.
If your builder gel was applied particularly thick or you have longer nails, extend the soaking time by 5-10 minutes. Never rush this step. Patience here prevents the temptation to scrape or pry, which causes the most damage.
| Method | Pros | Cons | Best For |
|---|---|---|---|
| Foil Wrap | Traps heat for faster breakdown; minimal skin exposure; can multitask during soaking | Requires wrapping each finger; slightly more setup time | Most people; those with sensitive skin; first-time DIY removers |
| Bowl Soak | Simple setup; can see progress; faster for multiple nails | Exposes more skin to acetone; requires staying still; uses more acetone | Experienced users; those with resilient skin; when removing gel from multiple hands |
| Silicone Caps | Reusable; comfortable; no foil waste; easy to remove and check | Requires purchasing specialized tools; may not fit all finger sizes | Frequent gel users; eco-conscious individuals; those who remove gel regularly |
Remove softened gel
After soaking, unwrap one finger to test the progress. The gel should appear lifted, flaky, or crinkled. Use your orangewood stick or plastic pusher to gently glide the softened gel away from the cuticle toward the free edge. The product should slide off with minimal pressure.
If the gel resists or feels hard, do not scrape or force it. Rewrap the nail and soak for another 5 minutes. Forcing gel off is the number one cause of nail plate damage during at-home removal. The gel should practically fall away when it’s ready.
Once the bulk is removed, you may notice small residues clinging to the nail surface. Use a soft 240-grit buffer to gently smooth away these remnants. Work lightly and stop frequently to check your progress. Clean your nails with rubbing alcohol to remove all dust and residue, revealing your natural nail underneath.
When to see a professional instead
While many people can safely remove soak-off builder gel at home, certain situations require professional intervention to prevent serious nail damage.
Hard gel identification: If your gel refuses to soften after 30 minutes of proper soaking with pure acetone, you likely have hard gel rather than soak-off builder gel. Hard gel is acetone-resistant and must be professionally removed with an e-file. Continuing to soak will only dry out your skin and nails without dissolving the product.
Pain or sensitivity: Stop the removal process immediately if you experience throbbing, persistent pain, burning sensations, or extreme discomfort. These symptoms may indicate that you’ve filed too deeply, have an underlying nail infection, or are experiencing an allergic reaction. Continuing could cause permanent damage to your nail matrix.
Uncertainty about nail layers: If you cannot distinguish where the gel ends and your natural nail begins, seek professional help. Over-filing your natural nail can thin the plate significantly, leading to months of recovery time.
History of thin or damaged nails: Those with naturally thin nail plates, previous nail damage, or compromised nails should consider professional removal. A trained technician can assess your nail condition and adjust their technique accordingly.
Professional removal services use gentle e-file techniques combined with acetone wraps to protect natural nails throughout the process. Technicians have specialized training to safely remove builder gel without causing damage, and they can identify potential issues before they become serious problems. If you’re in doubt about any aspect of the removal process, consulting a professional is always the safer choice.
Aftercare for healthy nails
Once your builder gel is removed, your nails are in a porous, dehydrated state. Acetone strips natural oils from both the nail plate and surrounding skin, making immediate aftercare critical for recovery.
Wash your hands thoroughly to remove all acetone residue. While your nails are still slightly damp, massage a high-quality cuticle oil (jojoba oil is ideal) into each nail bed and the surrounding skin. The oil penetrates more effectively when nails are slightly moist. Follow up with a thick, nourishing hand cream to restore your skin’s moisture barrier.
Consider giving your nails a “nail holiday” of one to two weeks if they feel thin, flexible, or sensitive after removal. During this recovery period:
Apply cuticle oil at least twice daily
Use a keratin-based nail strengthener or quality base coat to protect the nail plate
Avoid harsh chemicals and excessive water exposure
Wear gloves during household chores, dishwashing, and cleaning
These products help rebuild the nail’s structure and prevent breakage during the healing process. Water causes nails to expand and contract, which can lead to peeling and weakness in compromised nails.
Before applying any new nail products, clean your nails with rubbing alcohol to remove all oils and residue. This provides proper adhesion and longevity for your next manicure. With consistent aftercare, your natural nails will regain their strength and flexibility, ready for whatever nail look you choose next.
Professional builder gel removal at Xpert Russian Manicure Salon
For those who prefer professional care or encounter difficulties during at-home removal, Xpert Russian Manicure Salon offers specialized builder gel removal services that prioritize nail health above all else. Their technicians use a combination of gentle e-file thinning and acetone wraps to safely dissolve builder gel without aggressive scraping or prying that can damage the natural nail plate.
The salon’s approach is rooted in the Russian dry manicure technique, which emphasizes precision and nail integrity throughout every service. For clients with sensitive skin or nail concerns, they offer HEMA-free and TPO-free gel options that minimize the risk of allergic reactions. Their trained technicians can also provide personalized guidance on maintaining nail health between appointments and answer questions about safe at-home removal techniques.
Whether you need professional removal assistance or expert advice on caring for your nails after DIY removal, their team is ready to help you maintain healthy, beautiful nails.
Frequently asked questions
Can I use regular nail polish remover to remove builder gel?
No, regular nail polish remover is too weak to effectively break down builder gel. Standard removers contain water, oils, and conditioning agents that dilute the acetone concentration, making them ineffective against the cross-linked polymers in builder gel. Only 100% pure acetone can dissolve these strong chemical bonds. Using weak remover wastes time and may lead to frustration that causes you to scrape or pry the gel, resulting in serious nail damage.
How long does it take to remove builder gel at home?
The complete removal process typically takes 30 to 45 minutes from start to finish. Filing the top layer takes approximately 5-10 minutes, depending on the thickness of your gel application. The acetone soaking phase requires 15-20 minutes minimum, though thicker applications may need an additional 5-10 minutes. Gentle removal and cleanup take another 10-15 minutes. Rushing any step significantly increases your risk of nail damage, so patience is essential for safe removal.
Why won’t my builder gel come off after soaking?
Three main reasons explain stubborn builder gel. First, you may not have filed away enough of the protective top coat, preventing acetone from penetrating the gel layers. Second, your acetone may be old or contaminated with water, reducing its effectiveness. Third, and most importantly, you may have hard gel rather than soak-off builder gel. Hard gel is completely acetone-resistant and must be professionally removed with an e-file. If you’ve properly filed the surface and used fresh, pure acetone but see no progress after 30 minutes, seek professional help rather than continuing to soak.
How can I prevent damage to my natural nails during removal?
Never peel, pry, or force gel off your nails, as this strips away layers of your natural nail plate. Use only plastic or wooden tools, never metal implements that can scratch or gouge softened nails. Protect the skin around your nails with cuticle oil or petroleum jelly before applying acetone. Be patient throughout the soaking process. If gel doesn’t slide off easily, soak longer rather than scraping. Stop immediately if you feel any pain or discomfort. After removal, follow up with intensive hydration using cuticle oil and hand cream, and consider a brief recovery period before applying new products.